Address
304 North Cardinal
St. Dorchester Center, MA 02124
Work Hours
Monday to Friday: 7AM - 7PM
Weekend: 10AM - 5PM
Address
304 North Cardinal
St. Dorchester Center, MA 02124
Work Hours
Monday to Friday: 7AM - 7PM
Weekend: 10AM - 5PM
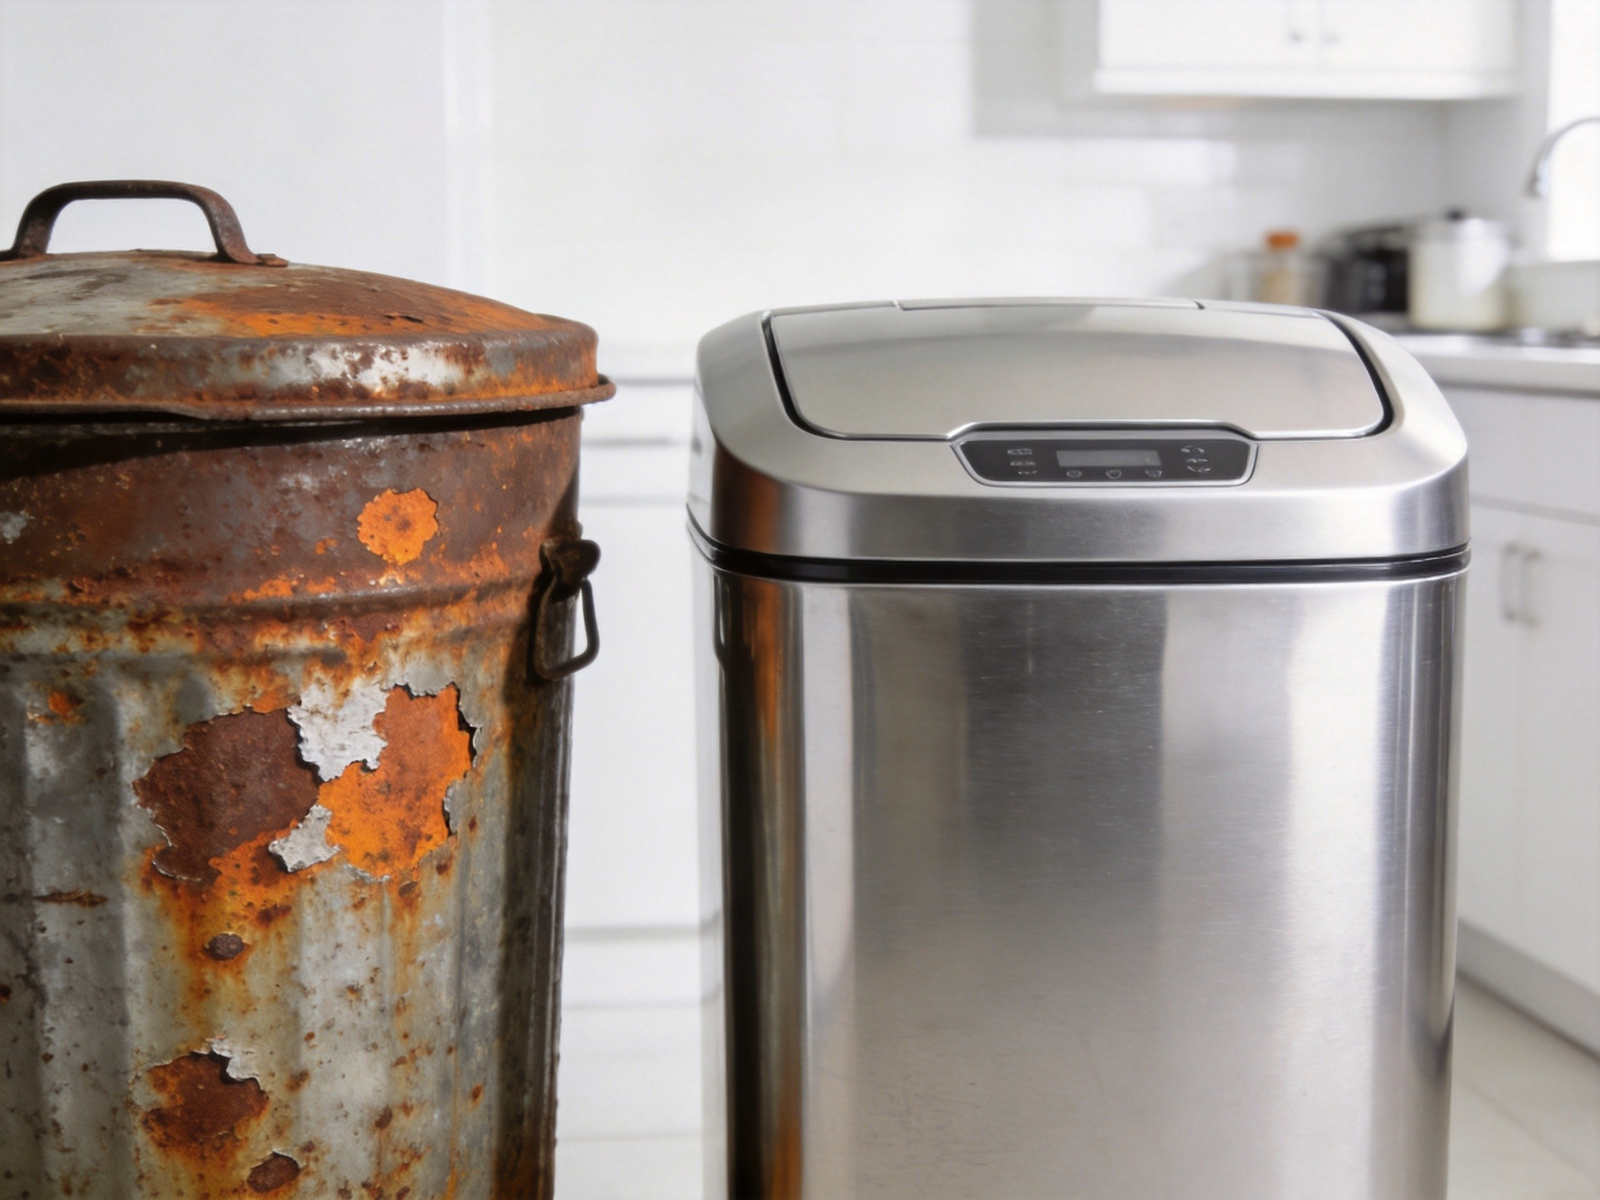
There’s few things more frustrating than noticing rust creeping up the sides or bottom of your kitchen trash can. After all, a trash can should be a simple, maintenance-free container — not something that degrades and unsightly within months. Yet rust remains one of the most common problems homeowners face, especially in humid kitchens and bathrooms.
Fortunately, understanding why your trash can rusts is the first step to preventing it. In this guide, we’ll break down the root causes, explain which materials are most vulnerable, and give you actionable strategies to keep your bin rust-free for years.
Before we get into solutions, let’s understand the science. Rust is essentially iron oxide — a chemical reaction that occurs when iron or steel is exposed to moisture and oxygen over time. In other words, if your trash can contains any ferrous metal and sits in a damp environment, rust is almost inevitable unless you take preventive steps.
First, you need a metal surface that contains iron (most steel trash cans qualify). Second, you need moisture — from condensation, leaks, wet trash, or high humidity. Third, you need oxygen — which, of course, is always present.
When all three combine, the oxidation process begins. Initially, you’ll see light orange or brown discoloration. However, if left untreated, the rust spreads, weakens the metal, and eventually creates holes or structural damage.
Not all areas of a trash can rust at the same rate. Specifically, the following spots are the most prone:
Since the bottom of the trash can sits directly on the floor — which is often cooler and collects condensation — it’s the most common rust starting point. Additionally, if you mop the floor and push the can back while it’s still damp, you’re essentially sitting the base in a pool of moisture.
Similarly, hinges, seams, and any spot where two metal pieces join are vulnerable. Water seeps into these tiny gaps, and because air circulation is limited, the moisture lingers. Over time, rust forms along these lines and spreads outward.
Of course, the inside of your trash can is exposed to the wettest conditions — food scraps, liquid spills, and decomposing waste all contribute to a corrosive environment. As a result, interior rust often develops faster than exterior rust, even though you can’t always see it right away.
To be clear, not all trash cans are equally susceptible. Here’s how common materials stack up:
表格
| Material | Rust Risk | Notes |
|---|---|---|
| Carbon Steel | High | Most prone to rusting; often used in cheap bins |
| Regular Stainless Steel (201 grade) | Medium | Better than carbon steel, but still vulnerable in humid conditions |
| Premium Stainless Steel (304 grade) | Low | Highly rust-resistant; used in quality kitchen products |
| Plastic / Polypropylene | None | Cannot rust, but may crack or discolor over time |
| Coated / Powder-Coated Metal | Low–Medium | The coating protects the metal, but scratches expose it to rust |
Therefore, if your current trash can is made from cheap carbon steel with a thin paint coating, rust is almost guaranteed — especially in a humid kitchen.
Now for the good news: preventing rust is entirely doable. Below, we’ve compiled the most effective strategies, ranging from simple daily habits to smarter purchasing decisions.
The most effective prevention starts at the point of purchase. If you live in a humid climate or your kitchen tends to get warm and moist, investing in a stainless steel trash can is one of the smartest decisions you can make.
For example, the Elylife B-series sensor trash cans are designed with high-quality stainless steel construction that resists corrosion while maintaining a sleek, modern appearance. Moreover, the sealed lid design prevents moisture buildup inside the bin — another key factor in rust prevention.
If you’d like to explore more options, our guide on the Best Smart Trash Can for Small Kitchens includes several rust-resistant picks at different price points.
This sounds obvious, but it’s the most overlooked prevention method. In practice, wipe down the outside of your trash can whenever you notice condensation or splashes. Particularly around the base and bottom edge, even a quick wipe with a dry cloth every few days makes a significant difference.
Wet trash sitting directly against the interior metal surface accelerates corrosion. By using a quality trash bag liner, you create a barrier between moisture and the metal. Additionally, change the liner promptly when it’s full — especially in summer months when decomposition happens faster.
As mentioned earlier, humidity is one of the three ingredients for rust. Consequently, reducing overall kitchen humidity helps protect all metal surfaces — not just your trash can. To do this, run your range hood while cooking, use a dehumidifier if needed, and open windows when weather permits.
Since floor moisture is a primary culprit, placing your trash can on a small mat, raised platform, or furniture feet can prevent ground-level condensation from contacting the base. Even a half-inch of elevation makes a meaningful difference.
If your current trash can shows early signs of rust, you don’t necessarily need to replace it immediately. Instead, try applying a clear rust-inhibiting spray or automotive wax to the affected areas. This creates a moisture barrier that slows further oxidation. Just make sure to sand away existing rust first and clean the surface thoroughly before applying any coating.
Finally, regular cleaning is the foundation of rust prevention. Ideally, wipe down the interior and exterior at least once a week with mild soap and water, then dry completely. For deeper cleaning, a monthly vinegar-and-water solution helps neutralize corrosive residues and removes early-stage rust spots.
For a detailed cleaning routine, check out our article on How to Keep Your Trash Can Clean Without Harsh Chemicals — it includes a step-by-step schedule that works perfectly for rust prevention.
Suppose you’re reading this and realizing your trash can is already showing rust. Don’t panic — early-stage rust is fixable. Here’s a quick recovery plan:
However, if the rust has created holes or the metal feels structurally weak, it’s time to upgrade. In that case, switching to a premium stainless steel or plastic smart trash can will prevent the problem from recurring.
At the end of the day, the best rust prevention strategy is starting with the right product. A well-made stainless steel trash can from a reputable brand will resist corrosion for years, even in humid environments. Meanwhile, a cheap carbon steel bin will cost you more in the long run — between replacements, cleaning products, and the sheer annoyance of dealing with rust every few months.
In our experience, the Elylife sensor trash cans strike an excellent balance of rust resistance, smart functionality, and affordability. Not only do they use quality stainless steel, but their sealed lid design and touchless operation also reduce moisture exposure and handling wear — both of which contribute to longer product life.
Rust doesn’t have to be an inevitable part of trash can ownership. By understanding what causes it — moisture, oxygen, and iron exposure — you can take simple, practical steps to protect your bin and extend its lifespan. Whether you choose to maintain your current can or upgrade to a more resistant model, the key is consistent care and smart material choices.
So take five minutes this week to inspect your trash can, wipe it down, and check those vulnerable spots. Your future self — and your kitchen’s appearance — will thank you.